
When opening SCOM Web Console, you may get the notification “Web Console Configuration Required”.
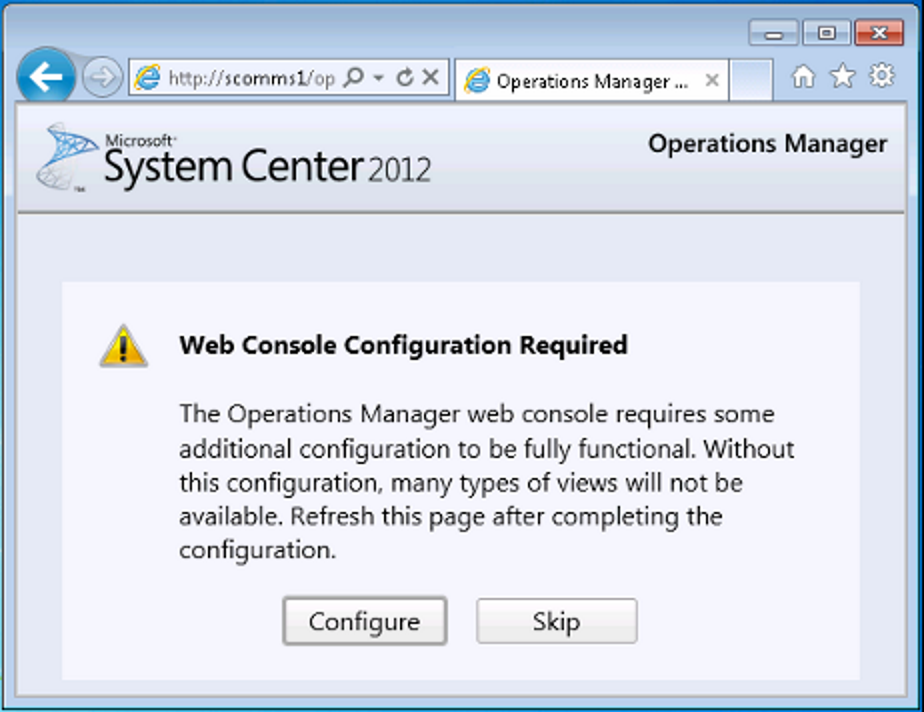
Normally you can click the Configure button (with SCOM Admin permission) and run the executable and refresh the browser window and you should see a web console login page next.
But you have run SilverlightClientConfiguration.exe but the problem still persists, you may want to continue with this article.
How to resolve the notification?
To find the way to resolve the notification, first we need to understand what SilverlightClientConfiguration.exe acutally does.
SilverlightClientConfiguration.exe actually does two things:
1. Import the certificate to the store “Trusted Publishers”.
2. Add the registry.
Path: HKLM\SOFTWARE\Wow6432Node\Microsoft\Silverlight
Value Type: Reg_DWORD
Key: AllowElevatedTrustAppsInBrowser
Value: 1
Now we know the story behind, we can do the same manually if the executable doesn’t work.
For more details, please refer to the article SCOM 2012 Web Console Configuration “NO LONGER Required!”.
It is a knonw issue in SCOM 2012 R2 UR12 and UR13
We have a known issue in SCOM 2012 R2 UR13 and UR14 that the dialogue will occur again after clicking Configure. In the two versions, SilverlightClientConfiguration.exe doesn’t import the certificate successfully.
Workaround
There is a workaround to resolve the issue. That must be applied to every machine where you want to open web console. The steps are actually a manual implementation of SilverlightClientConfiguration.exe.
- Click Configure in the dialog box.
- When you are prompted to run or save the SilverlightClientConfiguration.exe file, click Save.
- If you never ran SilverlightClientConfiguration.exe on the machine before, run it.
- Right-click the .exe file, click Properties, and then select the Digital Signatures tab.
- Select the certificate that has Digest Algorithm as SHA256, and then click Details.
- In the Digital Signature Details dialog box, click View Certificate.
- In the dialog box that appears, click Install Certificate.
- In the Certificate Import Wizard, change the store location to Local Machine, and then click Next.
- Select the Place all certificates in the following store option and then select Trusted Publishers.
- Click Next and then click Finish.
- Refresh your browser window.